

/image%2F2290813%2F20170309%2Fob_c3d2f0_img-0882.JPG)
FERME BEAUREGARD - WHAT WE'VE BEEN DOING

While staying with Jean-Francois and Annelyse, we experienced winter weather, summer weather and everything in between as is quite normal in March in this region of France! However, being that it is still technically 'winter,' we were still limited in the work we could do in the garden. Some things we were able to do (highlighted below) included constructing a support structure for, and then planting, kiwis, digging a trench for the asparagus, planting garlic, artichokes and comfrey, pruning the grape vines and putting up a deer fence. Other work we did included building a temporary terrace and bathroom for Lisa's yurt, and doing some construction for Jean Francois and Annelyse's future home. We also had one fun filled day of bread making in Beauregard's summer kitchen/bakery.
GARDEN

Kiwis & Citrus: Kiwifruits , members of the Actinidia family, are climbing woody vines which grow quite rapidly in locations with hot summers. Jean Francois had purchased 6 kiwis (5 females and one male plant) to transplant in the lower garden. However, as they are a climbing plant, they needed a structure to support, not only the thick woody vines that can grow over 10 feet in one growing season, but also the weight of the fruit they will bear in the future. Jean Francois had come across a greenhouse skeleton and decided to use that as a base for the kiwis. The first thing he did was to cut the metal legs to lower the skeleton.

This way they will be able to harvest the kiwis mostly by hand (rather than with ladders). Then together with two other WWOOFers (Lolita and Valentin), we put up the structure around the water tower (it will be interesting to see how the kiwis climb the water tower in the future!). After stablizing the the structure, we added horizontal metal wires every 50 cm for extra kiwi support. The last step was to plant the kiwis of course! And that we did another day with Lisa.

Once the kiwis become established the area beneath the support structure will be well shaded and will be used to protect veggies that have already been harvested, or possibly will shelter a small farm shop.
Back at Beauregard, we also transplanted citrus trees into larger pots including 1 orange tree, 1 lime tree and 3 lemon trees. As these species normally thrive in tropical climates, we transplanted them into pots so that they could be easily moved into and out of the greenhouse to stay at their desired temperature and be protected from spring snow and frosts which could not only ruin the fruit crop, but also could kill the tree. We put a layer of gravel at the bottom of each pot (to aid drainage), and then a mix of citrus potting soil (which is a bit sandy), composted sheep manure, and local green waste compost.

Garlic, Artichoke and Comfrey: Three other plants we planted during our stay at Beauregard were garlic bulbs, artichokes and comfrey. Garlic is commonly planted in the fall season and then overwintered, but as this past fall was very busy for Jean Francois he did not have a chance to plant them earlier. We, therefore took an afternoon to plant garlic cloves in the garden that had been prepared with a layer of hay that was already in the process of composting.

Next, we turned to the row of artichokes that had multiplied since being planted last year and were now quite crowded in their bed. Artichokes are a perennial plant and so do not need to be replanted every year. They reproduce by seed (the artichokes we eat are actually the flower bud that if left to mature on the plant eventually flower and go to seed), but also send up new shoots from the mother root system. It was these young sprouts that we divided by cutting a portion of the root off of the mother root system and replanted in a new row which became a perennial, 'natural' barrier between the garden
beds.

When transplanting artichokes, it is important to leave no more than one third of the original leaf structure.
Cutting off these leafs means that less nutrients and water need to be transported by the new, not yet established root system, but still permits the plant to undergo photosynthesis, creating enough energy to then strengthen and build up the root system throughout the spring and summer. Artichokes can remain productive for 10-15 years.

One of the larger planting projects we tackled was transplanting comfrey. Comfrey is one of the 'wonder plants' of a permaculture garden as it can be used as a fertilizer, mulch, companion plant and much more. It is a 'dynamic accumulator' meaning that it has a very deep and complex root system which pulls up nutrients that are otherwise out of reach for many other plant species. All of the nutrients absorbed by the plant are then stored in its leaves which can then be harvested and laid as mulch to be composted by microorganisms thereby releasing the nutrients to the other plant species. This method of 'chop and drop' mulching can be done four or five times a season, but should be done before flowering since afterward the nutrient content is lessened. One thing to be wary of however, is that although comfrey plants can reproduce by seed, they are most commonly propagated by their root cuttings. Because they have very complex root systems, once established, they could continue to grow from even from the smallest pieces of roots that are unknowingly left in the soil. Depending on how they are planted this could pose a problem, or just create more opportunities to harvest mulch and nourish the garden.
The comfrey we were working with was actually planted around the water purification system that had been expanding and multiplying into a nice ground cover. Jean Francois was interested in planting a portion of the garden with the comfrey to provide a temporary ground cover (as the leaves grow thick and quickly). We dug up the comfrey from the phytoremediation area that was in excess and transplanted the small root cuttings into their new home in the garden. As with artichokes and many other transplants of this type, it is important to clip and reduce the leaf structure of the plant to direct more energy to the root system.
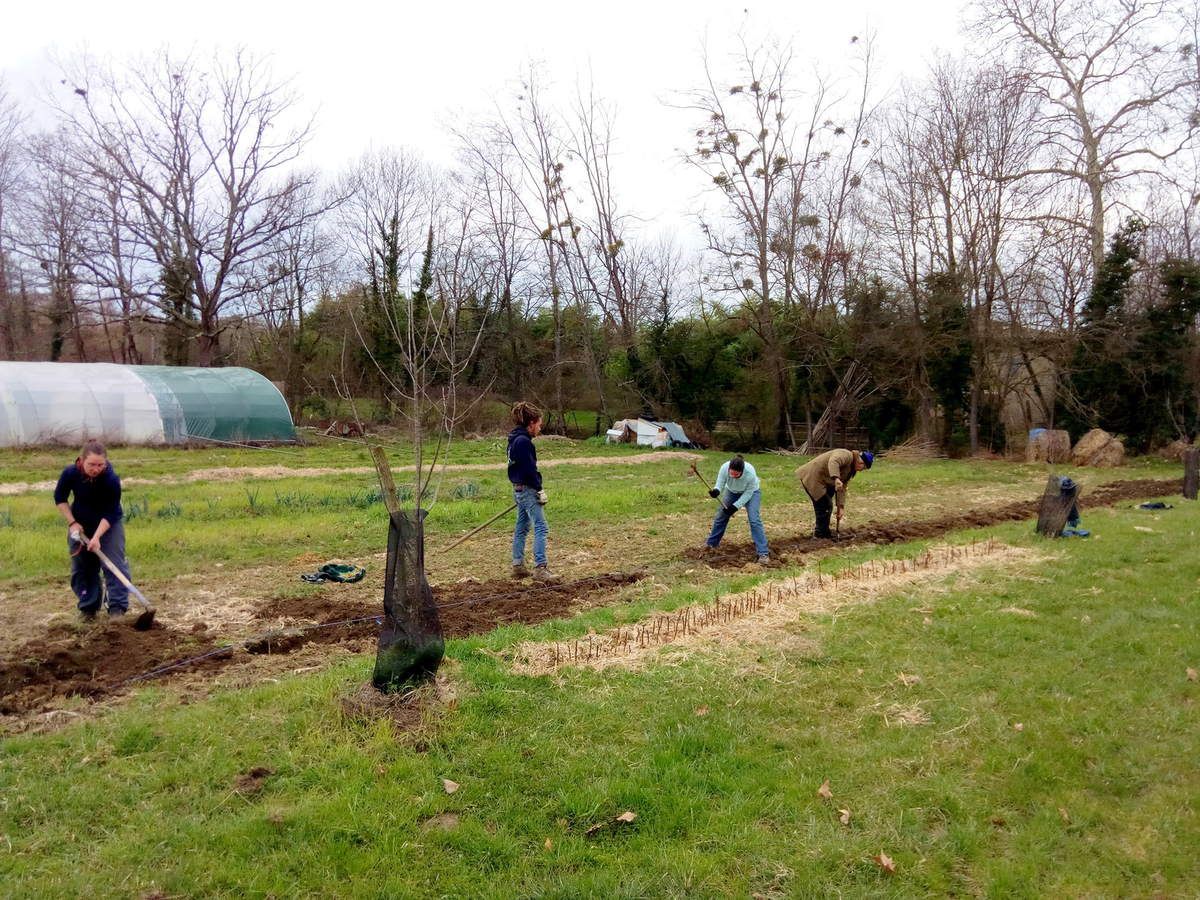
Asparagus: One of this year's projects for Jean Francois, Lisa and Marie is to plant an asparagus patch in the lower garden. Asparagus like moist, sandy soil, cooler weather and their shoots are usually harvested in the springtime. Asparagus are a perennial plant that once planted take 2 or 3 years before becoming established, but can continue to produce shoots for 30 years or more. We prepared one bed for the asparagus which we dug 15 cm deep and about 15 cm wide.
Grapes:

Jean Francois planted approximately 60 grape vines representing about 10 different varieties of table grapes on the Beauregard property. Originally, these grapes were intended to be used for making juice. However, it became apparent that with the numerous varieties, that was too large of a gap between the earliest ripening and latest ripening plants to have a large enough quantity of grapes at one time to permit juice making to be worth while. Jean Francois and Annelyse are not disappointed in their decision to plant so many different varieties of grapes however.

THis is because with different weather patterns, whether is is a late frost in spring, an early frost in autumn, etc., they are almost sure to have a grape harvest.
One of the tasks we were assigned was to remove the sheep manure that had been a heating bed in one of the greenhouses during the winter and add it to each grape vine for a spring fertilizer. We had to be careful not to put the manure too close to the actual vines however, because the manure could transfer a fungus to the grape vine leading to bark rot. The other lesson we had was one of grape pruning which should be done in winter before the sap begins to flow. Grapes are one of the plants that are most heavily pruned as this leads to larger and tastier grape harvests.

Jean Francois told us that the best technique is to cut off all of the old wood and leave just two new growth branches for the coming season.
The two that are chosen should have certain characteristics including; 1) facing a good direction (eg. upward toward the trellising lines rather than out into the path or toward the ground), and 2) to choose the most vigorous and strongest branches.
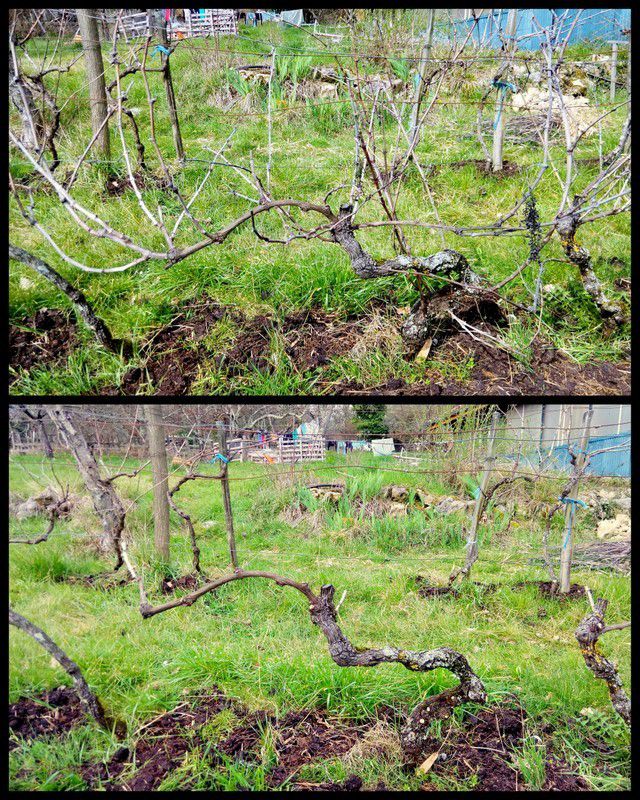
The two chosen branches should also be heavily pruned however leaving no more than 3 buds and no less than two. When pruning these two branches it is important to remember that all of the energy that would have gone into the rest of the branch (and the other branches already pruned) will be mainly directed into this last bud left on the branch. Therefore the final decision of how whether to leave 2 or three buds will depend on the the which direction final bud is facing. this is again an example where having the last bud located on the top of the branch (which will then grow up) is better than having it on the bottom of the branch (which will then grow towardthe ground).

Deer Fence: Chevreuil are the small (but still very destructive) deer species in France. They are smaller than white tailed deer in the US, and so do not jump quite as high, but deer fences are still necessary for agriculturalists everywhere to prevent a month of hard work to be treated as a free buffet to be eaten in one night!
We installed the fence by making holes with a digging bar, then hammering in the wooden fence posts.

The fence posts were made from acacia trees that Jean Francois had cut down in the wooded area on the Beauregard property. Next we drilled four holes in each post (the lowest being 30 cm above the ground to allow enough space for the weedwacker) and screwed insulators in each one. Insulators are intended for fences that will be electrified, as this fence will be.
Then we strung a metal wire through the insulators to complete the fence. At the end of the day, the fence we installed was about 51/2 feet tall at the highest point and about 5 feet at the lowest. Because the fence will be electrified, this will further deter deer from attempting to make the jump into the 'free buffet'.

CONSTRUCTION
Bathroom and Terrace for Lisa: Due to the weather and the timing of our visit, we got to participate construction projects at Beauregard. The first was working on a temporary bathroom and terrace for Lisa's yurt. Our timing overlapped with two other WWOOFers who were already at Beauregard and had already started the project. When we arrived, the terrace and structure were already complete.

We were able to help finish the project by installing the siding and metal roof over both the bathroom and the terrace to provide extra storage space.,We also helped with constructing the structure for the composting toilet, and the finished flooring.

Jean Francois & Annelyse's Future Home: The bigger project going on was working on renovations for the 1830s barn (currently the wood workshop) that will be Jean Francois and Annelyse's future home.

During our stay two of their sons arrived to help in the construction work of isolating and stablizing the stone walls with cement. The walls were originally constructed by piling stones on top of one another and cementing them in with a mixture of clay, lime and sometimes manure. This meant taking out loose stones and replacing them and also cementing areas that needed extra reinforcement.

After the walls were complete, we started to work on the ceiling/first floor.

Some of the original oak beams supporting the house were as they are still in good condition, and add a wonderful degree of charm, and attached additional 2x4s to create a flat surface to attach level cross beams to support the second level.
We also put in aluminum plated insolation boards filling the extra space between the insolation and subflooring with wood shavings (a free by-product from the wood shop).

The final step was to put on the oriented strand board (OSB) subflooring. There is still a good amount of work left to do on the house, but Jean Francois hopes to have it done within the year.
BAKERY
We also had the pleasure of spending a morning in the bakery during our stay at Beauregard. Jean Francois spent a few years in the bakery business and has kept up the tradition in his own home. He usually makes about 25 kilos (or about 55 pounds) of bread every three weeks or so (depending on the appetite of the WWOOFers and guests of course ;).

The flour he uses is milled by a local, hydropowered organic mill that has been producing flour for more than 200 years and grinds the flour between two large stones as is the tradition.

The night before, Jean Francois had fed the his 'starter' (live culture yeast) and we put the yeast and flour near the radiator to keep them warm. We then started the next morning at 7:30 am by firing up the homemade brick oven and adding wood every half an hour or so until it came up to temperature (290°C) around 1:00 pm.

Step 1 - At 9:00 am we began to prepare the bread by mixing warm water with salt to our 1.5 kilos of starter, then slowly mixing it with 16 kilos of flour (about 70% of the total flour weight). Then we covered the dough and let rise for 15 minutes.

Step 2 - By this time it was 10:00am and we 'threw the dough' to allow air to enter. This is done by picking up sections of the dough, stretching them up and throwing it down on the other side of the kneading trough.
This process is done 3 times (back and forth and back again) before covering and letting the dough rest another 15 minutes.
Step 3 - Kneading the dough to work the gluten. Gluten is what gives bread it's elasticity and the airy and chewy texture while also keeping its form. This was done by cutting portions of dough, kneading each briefly before throwing them into a pile in the kneading trough. After this step we let the dough rise for 2 hours.

Step 4 - We made loaves by weighing out 2 kilos of dough. Then the edges are gently folded and pressed into the center of the dough to form a circular shape. The dough is then flipped over, scooping the sides under and finally rolling it to pinch the dough into the bottom center. Then we placed each loaf into a cotton or linen lined basket with the smooth side down, covered them and left them to rise for 1 hour.

Step 5 - By this time the oven had come up to temperature. We emptied the ashes and cinders and then washed the oven bringing the temperature down to 200 degrees. The temperature is important because if it is too hot, the bread will burn on the outside and be raw on the inside. Jean Francois thinks it is better to have it be a bit too cool (as it can just stay a bit longer in the oven) rather than having it be too warm and burning the bottom of all of the bread!
Step 6 - Putting the bread into the oven with a bread paddle.

Step 7 - Fifteen minutes later we completed step seven which was to release water being held in the water canister (which was actually a shell recuperated from the trenches during World War 1 that a soldier had used as an artist's canvas) into the oven which immediately formed steam. This is also an important step as it is necessary for making a crunchy crust.

Step 8 & 9 - We left the bread in the oven for approximately ___ minutes before taking the bread out of the oven to cool, then followed by the final step; eating fresh made bread!
The three weeks we spent at Beauregard were quite memorable and we had a lovely time not only with Jean Francois, Annelyse and their family, but with Lisa, Johan and the other WWOOFers Valentin and Lolita as well.

Thank you to all for sharing good energy, knowledge and laughter with us! And a huge thank you, of course, to Jean Francois and Annelyse for their much appreciated hospitality, stimulating conversations, sharing their knowledge and all around kindness. We will be sure to stop by and see you again soon, but for now... off to the next adventure!


/image%2F2290813%2F20180324%2Fob_e5d957_img-20180307-163238.jpg)
/image%2F2290813%2F20180222%2Fob_5e29a5_img-20180118-082125.jpg)
/image%2F2290813%2F20180221%2Fob_199e24_img-20180118-082135.jpg)
/image%2F2290813%2F20180116%2Fob_9792c4_img-20170915-170247.jpg)
/image%2F2290813%2F20170313%2Fob_bbf005_img-1712.JPG)